1. Things are never as simple as they seem.
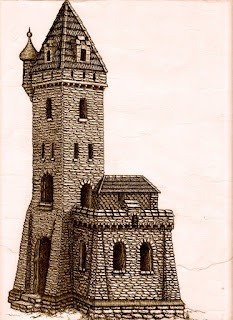
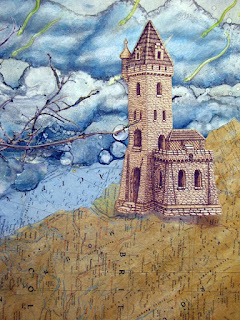
I wanted to put a castle up on the hill. The original is a pen and ink drawing I had done when I was a teenager. (Yes, they did too have pens and ink back then!) I didn't want to use the original, of course; also, it was the wrong size. So I scanned the drawing and reduced it to the proper size, and changed the ink color from black to brown, because I wanted that etching-y kind of look.

At first I thought I would just print it onto acid free paper and glue it on. But NOOOOOO, I couldn't do that! Too easy. I started thinking that the ink can run or smear when I get glue on it, so maybe an image transfer would be better.
I didn't have a lot of time to mess around with learning how to do image transfers, so I thought I'd take a shortcut, so to speak, and use Lazertran transfer paper. I happened to notice this product as I was browsing through the Dick Blick catalog. It's supposed to make easy waterslide decals, which can then be stuck onto anything. It looked cool, and I love to have art supplies fed-exed to my house, so I ordered it.
2. You never know what you're gonna get.
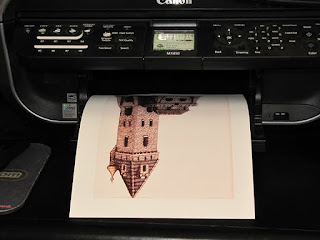
I read the directions, and it seemed pretty simple. I printed the image onto the Lazertran paper.

Though it looked fine on the monitor, it was way too dark once printed. So I tried again. Too light this time. I finally got one that I thought was just right.
3. You can waste a lot of time trying to save time.
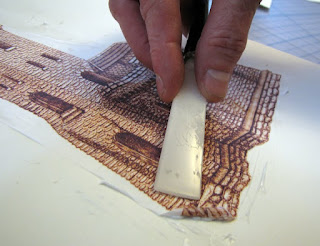
Now, to put it on the actual artwork- YAY! I waited for the ink to dry, soaked it in water for a minute, and it did, indeed, slide right off. There were two surprises, however. It was not at all sticky on the back as advertised. No big deal- I am the queen of glue. The other surprise was that the decal was practically transparent. The package, I thought, said it had a white backing. I guess they meant the actual paper that you take it off of...yikes! So now I have to glue it onto a piece of white paper anyway...

This would actually be pretty dang hilarious, if it wasn't for the fact that it was almost impossible to glue it onto the paper. The decal is so thin and delicate, it rips if you so much as look at it funny! Every time I put the slightest pressure on it to get the glue out from underneath- another rip!! By this time, the expression on my face looks something like this:

4. Live and Learn.
I've finished the gluing, attempting to carefully repair all the rips as best I can. I cut it out and tape it up on the piece to see how it looks, and now I think it may be too light! Can you believe it?!

So I'll probably end up just printing it on acid free paper after all....AAARRRGH!

Yes I have been up nights anxiously awaiting your first image transfer. :) I'm glad you've posted this.
ReplyDeleteBoy you are so right, are we long lost sisters or something??? Thing are never as simple as they seem and yes you waste a lot of time trying to save time... I do all of that.
The end result, I really do like. It is a fascinating process to me. And I just love the drawing...so delicate, detailed, and gorgeous.
Thanks for sharing! Love it.
Haha! Kathleen, thanks for letting me know I'm not the only one who does stuff like this. I do feel pretty embarrassed about it, but I guess at least I give people something to laugh at!
ReplyDeleteThe background is stunning. The use of the map is inspired. And I have to say...I do like your castle on the hill too!
ReplyDeleteHey Sharmon, as ong as you're doing some experimenting... try these.
ReplyDeletePrint out your image on regular copy paper in reverse (bassackwards for all us rednecks out there...) Take a nice heavy piece of illustration board or mounted watercolor paper (smooth) and cover the area where you want the image to be with acrylic matte medium. Place the image face down and smooth into the medium. Allow it to dry then take a household sponge with water and softly scrub away the copy paper. The medium soaks up the ink (pretty much most of it) and binds it permanently. Since you printed it in reverse the image now is how you originally drew it. Scrubbing away the paper backing leaves the ink and it's bound into acrylic medium so you can work over it with acrylics. Another method is to print out the image again on copy paper then take a colorless marker blender and rub on the back of the image (like we rub graphite on to do a transfer)turn the print over and place it where you want it and take the colorless marker and rub onto the front and it should transfer the ink to your new surface. I got that idea from a recent issue of The Artist's Magazine and thought it looked fun. I don't have markers for art but I bet a teacher might know where to come up with some. Since you're the mixed media queen I thought you might like trying these. I have tried the acrylic medium thing and found that using the lightest weight copy paper works best to scrub it out and I like using masonite boards covered first with a sanded layer of gesso and then another layer of medium before trying the transfer. It doesn't come out showing exactly every detail of the original but the effect I think is nice.
Good luck, let me know if you try!